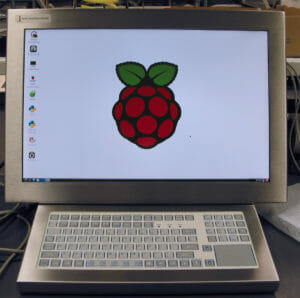
The Raspberry Pi is a small single-board computer originally created by the Raspberry Pi Foundation as an affordable tool for teaching computer science. Due to its low cost, ease of use, and broad community support, the Raspberry Pi is now being used in a variety of diverse settings with users installing them in everything from home automation systems to autonomous aircraft.
Update Jan. 2018 – Because this post was written a number of years ago, some information is outdated. For updated instructions on calibrating a Hope Industrial touch screen with Raspberry Pi, visit this blog post.
Most of our customers connect our touch screens and displays to full industrial or commercial PCs and thin clients for industrial HMI and SCADA applications. But with the popularity of the Raspberry Pi, we have had multiple customers ask about compatibility of our screens with the popular single-board device.
At Hope Industrial, we were intrigued by the possibility and we realized the viability of this concept should be tested for our customers. While we would generally not recommend a PC designed for the education and hobbyist markets to be used for mission-critical industrial control applications, there seems to be sufficient interest in the Raspberry Pi to warrant a closer look.
In this post, we will walk through the physical installation of a Raspberry Pi into one of our industrial touch screen monitors as a proof of concept for the Raspberry Pi option.
In a following post, we will show how to configure the Raspbian Operating System to work with our display and keyboard, including fully calibrated touch screen functionality.
Why Try Raspberry Pi?
First, we should say that when it comes to a complete graphical UI, the Raspberry Pi is slow. It is probably too slow for most desktop-PC tasks, but there are cases in which the Raspberry Pi could be used in a manufacturing environment such as displaying simple HTML files, using a simple Remote Desktop client like FreeRDP (or VNC, etc.), or building a custom Linux application designed to run well using Raspberry Pi. Just don’t expect to stream your high resolution Flash training videos, at least not with a stock Raspbian installation.
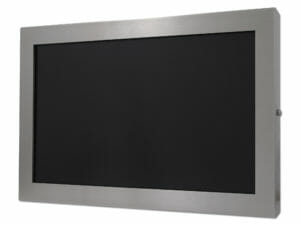
Touch Screen
Please note, this is only a proof of concept. We do not recommend this for any critical or business processes without first doing some additional testing. Aside from the fact that we cannot vouch for the computer’s reliability of time, there are two primary concerns with using the Raspberry Pi:
- Heat – The Raspberry Pi generates 3.5 watts of heat, which needs to make its way out of the enclosure to avoid overheating either the Raspberry Pi or the industrial touch screen electronics. This is not a large amount of heat, but it could be a problem in hotter environments.
- Compliance – Putting electronics inside the cable cavity of our industrial monitor would constitute a change to a critical component according to UL listings and other compliances (such as NEMA and IP ratings). This is not something we could sell as a standard product without additional certification, and doing this to your display could cause you to lose compliance with other standards you may require.
Also note, we could solve most of the above issues by putting the Raspberry Pi in a small attached enclosure. If that interests you, please contact us.
The Parts We Used
In order to show a full industrial workstation, we chose both a touch screen and an industrial keyboard:
Hope Industrial Systems Components:
- Hope Industrial 22″ Universal Mount Touch Screen (HIS-UM22-STAB) – This is currently one of our largest fully enclosed displays, and, importantly, it has a DVI video input (present in all our sizes 19″ and above). The Raspberry Pi has an HDMI video output which can be adapted to DVI with a simple cable, so a DVI monitor must be used if you don’t want to buy an analog converter.
- Compression Gland Cover Plate
- Monitor-Mounted Short-Travel Keyboard with Touchpad (KB-M2-EXT-SS4-4X-USB) – This is the USB version of our fully sealed IP66-rated short-travel keyboard. This version is popular in food and pharmaceutical environments where a flat, easy-to-clean surface is needed.
Other Components:
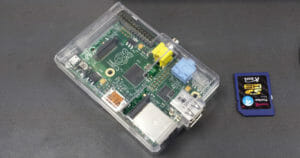
- Raspberry Pi 3 Model B – This is the most up-to-date version (as of January 2018).
- Raspberry Pi case
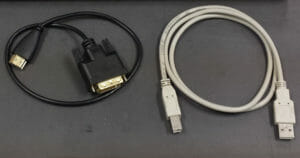
- 1.5 ft. HDMI to DVI Cable – We needed a short adapter cable, so the excess would fit in the display.
Other off-the-shelf cables and bits:
- Standard USB cables, Ethernet cable, 4 GB SD card, and a standard 1 amp micro-USB phone charger (to power the Raspberry Pi).
How to Piece it All Together
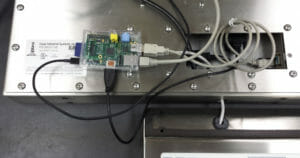
1. We were able to fit all components and cabling into the cable connection cavity of our Universal Mount 22″ display. The cable connections inside the cavity were low enough to allow room for the Raspberry Pi to sit on top of the connectors and flush with the cavity opening. Of course, we had to use the smallest, lowest profile cables we could find.
2. We made the following connections:
- HDMI on the Raspberry Pi to the DVI connector on the display
- USB from the Raspberry Pi to the Keyboard and Touch Screen ports on the inside of the display
- Ethernet and power (for both display and Raspberry Pi) from outside the monitor
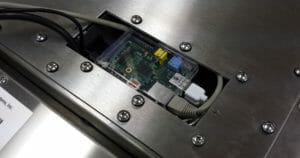
3. We coiled excess cable inside the cavity and placed it beneath the Raspberry Pi.
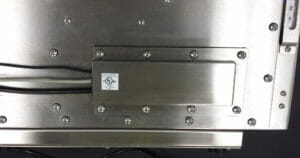
4. We led cables out through our standard NEMA 2/IP22-rated cover plate for the demo, but you could easily use our Conduit Cover Plate for a full NEMA 4X/IP66-rated enclosure.
5. Finally, we secured the cover plate to the monitor, and we mounted the keyboard to the monitor base.
6. We did not use a mount in the demo, but any of our standard industrial display mounts would work.
The final product looks no different from our monitor, except a fully functioning Raspberry Pi is now built right in!
In Our Next Posts
After installing the Raspbian OS using instructions from the web, the Raspberry Pi system will be fully functional. The keyboard works right out of the box, and the touch screen responds to touch, but is not calibrated.
In other posts, we will provide detailed instructions on how to calibrate and align the touch screen without using an outside driver. We’ll also show how to enable the “hold-to-right-click” feature, which is essential when using a touch screen without a mouse.
- Follow this blog post to set up your touch screen using the latest versions of Raspbian 9 Stretch.
- If you are using an earlier version, follow this blog post to set up your touch screen.